Pages

Showing posts with label Recipes. Show all posts

Tuesday, 3 February 2015

Healthy Vegan Chocolate and Almond Cookies


For many the start of a brand new year often brings about expectations of change and the cliché ‘New year, new me’ scenario.  Although often these goals may get off to a good start, come February they slowly start to lapse and may eventually fizzle out.
This year instead of making unrealistic goals, I decided to try and make small lifestyle changes in the hope that they would stick and eventually lead to better things! On my quest for a healthier lifestyle, I chose to seek alternatives to some of the ‘naughty but nice’ foods rather than cutting them out completely.

After a bit of research and a few adaptations and tweaks I discovered a recipe for healthy vegan cookies. Although they are not as sweet as the average cookie, they’re tasty so you feel like you’re having a treat, when in reality they are made of nothing but healthy ingredients!

Makes 8 - 10 cookies

Ingredients:

1/2 ripe banana mashed
1 cup ground almonds
1/3 cup linseed (or flaxseed)
2 heaped tbsp cocnut oil
1.5 tbsp pure maple syrup
1 tbsp almond butter or sunflower oil
1 - 1 1/2 tsp cinnamon
1/2 tsp ground nutmeg, ginger and course sea salt
1/2 tsp baking powder
5 squares dark chocolate chopped

(2 tbsp cocoa powder)


1. Preheat the oven to 170c

2. Next mash half a ripe banana and set to one side

3. Chop the dark chocolate into small chunks or alternatively use chocolate chips. If you are not vegan feel free to use milk or white chocolate as a slightly sweeter option.

4. Place the coconut oil in a saucepan on a low heat until melted.

5. Add the syrup, spices and salt to the saucepan still on a low heat and stir until fully combined.

6. If like me you don't have ready ground almonds, place whole almonds in a food processor and blend to a fine consistency.

7. In a large mixing bowl combine the ground almonds, linseed and baking powder. Next add the mashed banana, chocolate chunks and butter/oil and lightly mix.

8. Add the melted wet ingredients to the mixing bowl, stirring until evenly mixed and the ingredients are sticking together.

9. Line a baking tray with greaseproof paper and place a tablespoon size portion for each cookie onto the sheet.

10. lightly press down on the dough using a fork to create a rounded cookie shape.

11. Bake in the oven for 15 minutes until golden and allow to cool before serving.


For a slightly more chocolatey take on the cookies (my personal favourite) try replacing the ground ginger and cinnamon for 2 tablespoons of cocoa powder. You may need to add a little water if the mixture is too dry.

Tuesday, 5 August 2014

My take on Prezzo's Pollo E Spinaci Salad


For as long as I can remember, I've always been someone who is fairly health conscious and try to lead a well-balanced lifestyle as much as possible. Don’t get me wrong I do enjoy the odd treat, as long as everything is in moderation, but recently I've been trying to make healthier lifestyle choices, without having to cut out all that I love.

I'm quite a foodie at heart and love cooking and experimenting with different ingredients, as well as going out for meals. While it’s fine to eat out occasionally the thing that puts me off, is the fact that you don’t know exactly what has gone into your food. For this reason, I have been looking for healthier alternatives to some of my favourite restaurant dishes.

If you read my last post, you'll know that a few months ago I moved to sunny Spain! Now I don’t know if it’s the heat or simply the change in scenery, but since moving here I've been craving healthy food…salads in particular and lots of them! One salad that I've really missed, has got to be Prezzo's ‘Pollo E Spinaci’, one of my all-time faves! Although this dish is probably relatively healthy anyway, the beauty of home cooking is having control over what ingredients go into your food and no hidden nasties! I therefore decided to do my own take on this salad, with a couple of tweaks here and there.

The quantities used, I found to be the perfect amount for 3 adults, but you can obviously adjust this accordingly, depending on the number of people and your appetite!


For the salad you will need:

Ingredients:
Approximately ½ a bag of baby leaf spinach
1 punnet of field mushrooms
½ a red pepper
½ a yellow pepper
1 large chicken breast
1/3 cucumber
1 1/2 avocados
Handful of cherry tomatoes
Sprinkling of cooked quinoa

Honey Mustard Dressing:
80ml Extra virgin olive oil/coconut oil
160ml honey
40ml lemon juice
20ml Dijon style mustard
Pinch of salt

Instructions:

On the whole the preparation for this recipe can be done in any order, but the main thing to bare in mind, is that you want the peppers, mushroom and chicken to still be hot/warm when served.

1. For the first step I decided to wash and cut the peppers in 2 halves.  Next remove the core and seeds, slice into thin strips and set to one side.


2. Wash and cut the ends off the mushrooms. As I was using small field mushrooms, I chose to slice them in half, but you can adjust this depending on the size of the mushrooms and your preferences. Again set to one side.


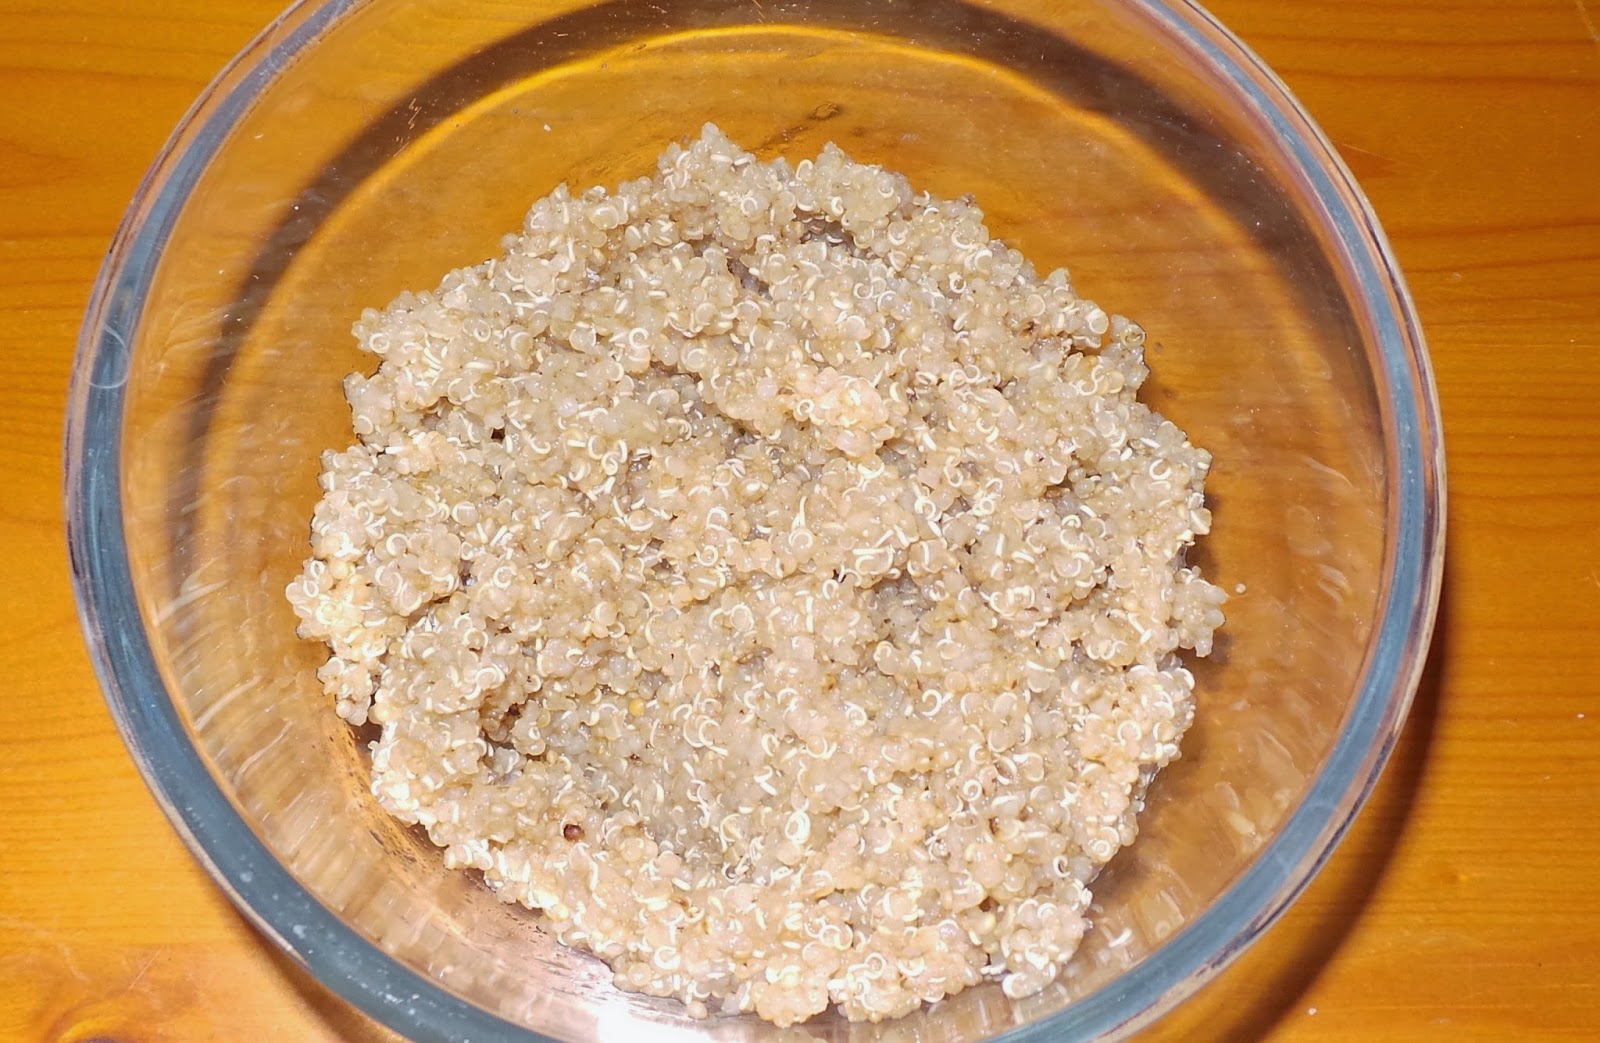
3. Although the Prezzo salad doesn't contain quinoa, I chose to include it in my recipe for the added health benefits and protein.  Make sure to rinse the quinoa thoroughly and following the cooking instructions on the side of the packet, mine took approximately 20 mins to cook. Once cooked, drain and leave to cool. 


As you only need a sprinkling of quinoa in the salad you don't need to cook a lot, bare in mind that it expands in size quite generously after being cooked. As you can see, I made too much, on the plus side I had some left over for lunch the next day!


4. At this point I decided to make the honey mustard dressing. Now obviously you can buy this ready made in the shops, but as I was going for the healthier option, I decided to make it myself. The dressing was so easy to make and only contained 5 ingredients: Extra virgin olive oil/coconut oil, honey, lemon juice, pinch of salt and Dijon style mustard.  Place all the ingredients in a small bowl and mix until combined...it really is that simple! 

5. The next step is time to prepare the chicken.  I have to say this is the part I dread the most...it's just something about touching raw meat! In fact this is part of the reason I like cooking vegetarian meals the best. You can choose to cut the chicken however you like, it really is down to personal preference, but I chose to slice it into small strips as I found it cooks quickly this way. After doing this place the chicken in a large bowl drizzle with a little sunflower/olive oil making sure all the chicken is covered and season with salt and pepper.


5. Place a griddle pan over medium heat. Once hot, place the chicken strips in the pan and cook for approximately 2 mins each side until they have a chargrilled effect on the outside and are no longer pink when cut in the middle (again you may need to adjust this depending on the size of your chicken pieces).


6. In the meantime place the mushrooms and peppers in a pan and lightly fry until slightly wilted.


7. Prepare the bed for the chicken by lining a bowl with spinach leaves. Next halve the cherry tomatoes, slice the cucumber and avocado and mix into the leaves.


8. Once cooked top with the char-grilled chicken, peppers, mushrooms, a sprinkling of quinoa and drizzle a little honey mustard dressing over the top. As I was cooking this for family I also decided to add a side of home made garlic bread, but I enjoy the salad just as much on its own.


Saturday, 5 April 2014

DIY Lush inspired H'suan Wen Hua hair mask

Having fairly recently gone from a brunette to blonde, getting highlights can begin to take it's toll on your hair and blonde hair in particular can have a tendency to become dry.  I have therefore been on the look out for a rich deep conditioning treatment, to help reduce any damage to my hair, helping it to retain moisture and stay healthy for longer.

After shopping around, and reading numerous different reviews, one that seemed to stand out, with a lot of good comments was Lush's H'suan Wen Hua hair mask, so I decided to give it a go. The hair mask claims to be 'full of protein-rich, nourishing ingredients to revive your hair and improve its condition'.  You apply this conditioner to dry hair and leave it for approximately 20 mins before shampooing and conditioning your hair as normal. 

Although it has quite an unusual scent which some people may not like (I personally didn't mind it) after just one use I completely fell in love with the product and how soft, nourished and glossy it left my hair. It was just what I'd been looking for and as it contains fresh, organic ingredients the mask really did feel like it had improved the condition of my hair, rather than just coating it in silicones which many conditioners seem to do.  

The only downside of the H'suan Wen Hua hair treatment was the price...considering you are meant to use between 1/2 - 1 full tub for long hair, (I used less) at £8.95 it's definitely not the cheapest mask if your looking for something to use on a regular basis.  As a result I thought I would have a go at making it myself...working out at a fraction of the cost!

You will need the following ingredients:
1/2 free range egg
1 small banana
1/2 ripe avocado
2 tsp lemon juice
1 tsp balsamic vinegar
2 tsp extra virgin olive oil
1 tsp rosemary oil
1 tsp cinnamon leaf oil
2 tsp bay leaf infusion


Step 1:

For the first step, I started by making the bay leaf infusion. Pour a small amount of boiling water over a few dried or fresh bay leaves (fresh is best, but I had to make do with what was in the cupboard) cover and set aside to soak.  Use as little water as possible...just enough to cover the leaves, as the more you add the more diluted the solution will become.


Step 2: 

Use a sharp knife to cut an avocado in half and remove the stone.  Next use a teaspoon to scoop the avocado out of the skin and place in a small bowl before mashing to a smooth consistency.  

Containing over 25 vital minerals, including vitamins A,B,C,E and K avocados offer many health benefits. However for the hair in particular it's the oils in the avocado which help to moisturise and rejuvenate the scalp.  Avocados are also a rich source of proteins and amino acids, helping to deeply condition and revitalize dry, damaged hair and promote the growth of healthier hair.


Step 3:

At this stage, although it wasn't listed in Lush's ingredients, I decided to add 2 teaspoons of lemon juice as it helps to prevent the avocado from turning brown, helping to keep the vibrant green colour, for longer. The cleansing and stimulating properties of lemon juice also make it an ideal ingredient for hair products, helping to fight against dandruff, strengthen and promote hair growth, make it more resistant to breakage and reduces the effects from the use of chemical hair products and pollution to name but a few. What's more lemon juice can also be used as a natural bleach to assist in brightening blonde or fair hair.


Step 4:

For the next step I broke up a small banana and added this to the avocado. I then mashed the ingredients together, once again.

Bananas are another completely natural ingredient, again offering many health and beauty benefits.  As they are rich in potassium, natural oils, carbohydrates and vitamins they help to soften and protect the hair's elasticity, preventing breakage and split ends. They are also known to promote growth, and enhance the hair's natural shine.

Step 5:

Next I cracked a free range egg into a cup and lightly whisked it before adding this to the rest of the ingredients.

Eggs are an excellent source of rich protein and are known to strengthen the hair follicle, enhancing the resistance of hair breakage and split ends, resulting in thicker, healthier hair.  Eggs also help to condition the hair and add shine by maintaining the natural oils, which are often striped away by shampoos. 


Step 6:

To the mixture I also added 2 teaspoons of olive oil and 1 teaspoon of balsamic vinegar and mixed well.

You may think of olive oil as a typical ingredient for cooking, but it also has a number of benefits for skin and hair care.  Being rich in antioxidants and vitamins A and E, olive oil helps to seal in moisture and protects the hairs natural keratin and assist in hair growth.  The balsamic vinegar helps to add extra shine.


step 7:

Next add 1 teaspoon rosemary oil and 1 teaspoon cinnamon leaf oil.

Both rosemary and cinnamon leaf oil are used to stimulate healthy hair growth and increase circulation to the scalp.  They also add a nice warming, woody and relaxing fragrance to the hair mask.

Step 8:

For the final step add 2 teaspoons of the Bay leaf infusion you made earlier and add it to the mixture.  Use an electric blender to remove any remaining lumps...no one wants chunks of avocado left in their hair!


Pour the mask into an airtight container, add a label and store in the fridge for up to 5 days. After a couple of days the mask will start to lose its vibrant colour and turn a more unappealing brown, the oils may also start to separate from the mixture, so make sure to stir it well before use.

Although the mask does feel quite an unusual texture to apply,and the results weren't immediately obvious, after drying my hair it really did feel like it had done some good, leaving my hair super soft and shiny.  

As with the H'suan Wen Hua mask, I applied this to dry hair and left it on for about half an hour. Depending on your hair type and condition you can increase or reduce the time accordingly. Make sure to apply this over the bath as it can get a little messy!  I then went ahead and shampooed and conditioned my hair as normal. 

The ingredients of this mask are essentially food for your hair. Just as your body needs food in order to function properly and stay healthy, I feel we should also treat our hair in a similar way, providing essential proteins, vitamins and minerals for growth and healthy locks.




Wednesday, 22 January 2014

Lemon Drizzle Cake

On an everyday basis I generally try to eat a healthy and well balanced diet, but recently I have developed quite a sweet tooth, and homemade cake has definitely become my downfall!  I love baking and cooking when I have the opportunity to do so.  I’ve often experimented with different recipes, and have baked a variety of cakes over the past few years, anything from a traditional Victoria sponge, rich red velvet cake through to chocolate cake pops and slightly healthier banana and oatmeal muffins. 


Today, I found myself with a few hours free, so I thought I would use this time wisely (or unwisely, depending on how you look at it) and make one of my all time favourites…Lemon Drizzle! I absolutely love the light texture of this cake, combined with the sweetness of the icing sugar and the zesty lemon glaze.
Amazingly I have found this to be one of the easiest cakes to make, yet one of the tastiest. The recipe is so simple and requires little technical skill, so is well suited to novice bakers as well as the more experienced. There’s also the bonus of using sunflower oil rather than butter, so there’s nothing to melt, making this recipe quick and healthier!

To make the cake you will need the following ingredients:


Serves 8

Sunflower oil or melted butter for greasing
200g plain flower
2 tsp baking powder
200g caster sugar
4 eggs
150ml soured cream
Grated rind of 1 large lemon
4tbsp lemon juice
150ml sunflower oil

Start by lightly greasing a 20cm round cake tin and line the base with baking paper(or opt for a less conventional heart tin, like I did).

Sift the flour and baking powder into a mixing bowl and stir in the caster sugar. Although quite honestly I have never sifted the flour myself, so if you’re a bit pushed for time, it won’t hurt to miss out that step.

Now is a good time to preheat the oven to 180°c (Slightly lower if you have a fan assisted oven). As you can see from the image above, my cake ended up being slightly more well done than I'd hoped as I didn't reduce the temperature,for my fan oven. Ooops!


Next zest and squeeze the lemons.

In a separate bowl, whisk the eggs, soured cream, lemon rind, 4 tbsp of the lemon juice and oil together. Set the remaining freshly squeezed lemon juice aside, as we will be using this for the glaze later.


Pour the egg mixture into the dry ingredients and mix until evenly combined. You can use an electric whisk at this stage, but I found a basic wooden spoon did the job nicely. (As the mixture is fairly runny and thin in texture, it didn't make my arm ache either!)

Pour the mixture into the prepared tin and bake in the preheated oven for 45–60 minutes, until risen and golden brown.

Now to make the lemon glaze.  

You will need:
4 tbsp icing sugar
3 tbsp lemon juice

I found that approximately the last 10 mins of baking time, was a good time to start making the syrup. Mix together 4 tbsp icing sugar and 3tbsp of the lemon juice you set aside earlier.  Stir over a low heat, until just beginning to bubble and turn syrupy.


As soon as the cake is out of the oven, prick the surface with a skewer or sharp knife, then brush the syrup over the top.

Leave the cake to cool completely in the tin, before turning out and serving. If you want to make it just a little bit prettier, you could add a few pieces of lemon rind or a dusting of icing sugar on top! And that’s it! A yummy and zesty cake that’s quick and easy to make!


If anyone has a go at making this, I'd love to know how you get on! Bye for now x